이 문서는 Debian_Sid kernel 2.6.29 에서 HDTV 를 보기 위한 방법을 기술한다.
장치 설정
HDTV 카드
| Item | Specifications |
| Input/Output | TV antenna reception port 1 Composite(using dongle cable), 1 S-Video Video Input Direct audio stream output to sound card(HDTV) |
| Compatibility (DVHS) | Running on Windows XP or later only. 1394(Firewire) port |
| Drivers | Conexant CX23882 drivers Dvico's own tuner driver Dvico's own full software HDTV decoder Dvico's own DxVA software HDTV decoder |
커널 설정
-> Device Drivers
  ->Multimedia devices
   -> <M> DVB for Linux
    -> [*] Load and attach frontend and tuner driver modules as needed
    -> [*] Video capture adapters
      -> <M> BT848 Video For Linux
          -> [*] DVB/ATSC Support for bt878 based TV cards
      -> <M> Conexant 2388x (bt878 successor) support
          -> <M> Conexant 2388x DMA audio support
          -> <M> Blackbird MPEG encoder support (cx2388x + cx23416)
          -> <M> DVB/ATSC Support for cx2388x based TV cards
    -> [*] DVB/ATSC adapters
      -> <M> Support for various USB DVB devices
          -> [*] Conexant USB2.0 hybrid reference design support
펌웨어 설치
$ cd /usr/src/linux/Documentation/dvb
$ sudo perl get_dvb_firmware  bluebird
$ sudo  mv dvb-usb-bluebird-01.fw /usr/lib/hotplug/firmware
$ sudo ln -s /usr/lib/hotplug/firmware/dvb-usb-bluebird-01.fw /lib/firmware
또는
$ sudo wget http://www.linuxtv.org/download/dvb/firmware/dvb-usb-bluebird-01.fw
$ sudo  mv dvb-usb-bluebird-01.fw /usr/lib/hotplug/firmware
$ sudo ln -s /usr/lib/hotplug/firmware/dvb-usb-bluebird-01.fw /lib/firmware
디바이스 동작 확인
USB 에 접속한 후 아래와 같은 방법으로 확인한다.
dmesg로 확인
dvb-usb: generic DVB-USB module successfully deinitialized and disconnected.
usb 1-4: new high speed USB device using ehci_hcd and address 6
usb 1-4: configuration #1 chosen from 1 choice
dvb-usb: found a 'DViCO FusionHDTV5 USB Gold' in warm state.
dvb-usb: will pass the complete MPEG2 transport stream to the software demuxer.
DVB: registering new adapter (DViCO FusionHDTV5 USB Gold)
DVB: registering adapter 0 frontend 0 (LG Electronics LGDT3303 VSB/QAM Frontend)...
tuner-simple 4-0061: creating new instance
tuner-simple 4-0061: type set to 64 (LG TDVS-H06xF)
input: IR-receiver inside an USB DVB receiver as /class/input/input5
dvb-usb: schedule remote query interval to 100 msecs.
dvb-usb: DViCO FusionHDTV5 USB Gold successfully initialized and connected.
device 로 확인
$ ls -l /dev/dvb/adapter0/
crw-rw----+ 1 root video 212, 4 2009-04-21 22:50 demux0
crw-rw----+ 1 root video 212, 5 2009-04-21 22:50 dvr0
crw-rw----+ 1 root video 212, 3 2009-04-21 22:50 frontend0
crw-rw----+ 1 root video 212, 7 2009-04-21 22:50 net0
채널 검색
프로그램 설치
$ sudo apt-get install dvb-apps
채널 검색
안테나 사용시
$ mkdir ~/.azap
$ scan /usr/share/dvb/atsc/us-ATSC-center-frequencies-8VSB >> ~/.azap/channels.conf
케이블1
/usr/share/dvb/atsc/us-Cable-Standard-center-frequencies-QAM256 파일을 ~/us-Cable-Standard-center-frequencies-8VSB으로 복사한 후 vi등 에디터를 이용해서 파일안의 QAM256을 모두 8VSB로 변경한 후 scan 명령을 사용한다.
$ mkdir ~/.azap
$ scan ~/us-Cable-Standard-center-frequencies-8VSB >> ~/.azap/channels.conf
케이블2
$ mkdir ~/.azap
$ scan /usr/share/dvb/atsc/us-Cable-Standard-center-frequencies-QAM256 >> ~/.azap/channels.conf
채널 이름 설정
~/.azap/channels.conf 를 열어보면 채널 이름 없이 아래처럼 나온다(집이 난시청 지역인지 MBC는 보이지 않는다.).
$ cat ~/.azap/channel.conf
:623028615:8VSB:17:20:1
:641028615:8VSB:33:36:1
:677028615:8VSB:33:36:1
MBC DTV:749028615:8VSB:17:20:1
채널 이름을 넣어준다.채널 값은 지역마다 다를 수 있기 때문에 꼭 scan 해봐야 한다.
EBS:623028615:8VSB:17:20:1
KBS1:641028615:8VSB:33:36:1
KBS2:677028615:8VSB:33:36:1
MBC DTV:749028615:8VSB:17:20:1
리모콘 설정
@todo
프로그램별 설정
Mplayer
채널 설정
$ ln -s ~/.azap/channels.conf ~/.mplayer/channels.conf
TV 시청
실행할 때 채널 이름을 직접 입력한다.
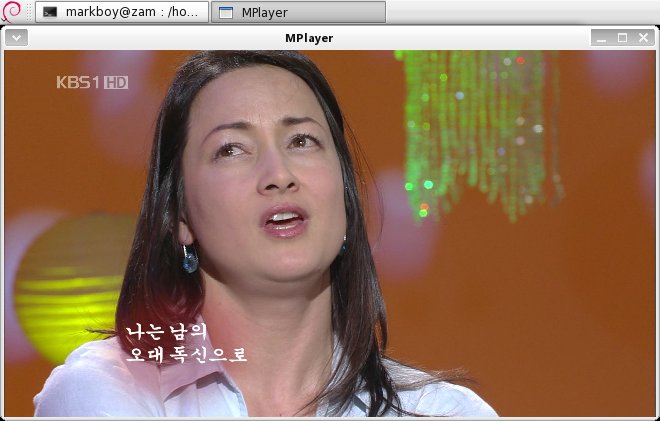
mplayer dvb://KBS1
Totem
채널 설정
Totem은 backend로 GStreamer gst-plugins-bad 0.10.6 을 필요로 한다.또는 Xine을 사용할 수 있는데 이 문서에서는 GStreamer를 사용한다고 가정한다.
$ ln -s ~/.azap/channels.conf ~/.gstreamer-0.10/dvb-channels.conf
TV 시청
동영상 - 'DVB 어댑터 0' 에서 TV 보기 메뉴를 선택한다.GStreamer 문제인지 다른 설정 문제인지 몰라도 첫 화면이 표시된 후 화면이 갱신되지 않는다(정지 화면처럼 보인다.
채널 선택은 playlist를 사용한다.

Xine
채널 설정
$ ln -s ~/.azap/channels.conf ~/.xine/channels.conf
TV 시청
playlist 를 열고 DVB를 선택한다.

me-tv
채널 설정
metv를 실행하고 ~/.azap/channels.conf 파일을 import 한다.
TV 시청
그냥 실행한다.

VLC
VLC를 실행하고 미디어 - Stream메뉴를 선택한다(보기 - 재생목록 화면에서 고급 열기을 선택해도 된다.
갈무리 장치를 선택하고 아래와 같이 주파수를 선택하면 된다.

여기서 재생을 선택하면 재생목록에 추가되면서 바로 시청이 가능하고, 대기열에 넣기를 선택하면 재생목록에만 추가된다.

TV 녹화하기
@todo vdr
Reference